Recently Viewed ›
Recently Downloaded 
Close x
> Properties of a trapezium at a glance
> How do I know if it's a trapezium?
> How do I find the perimeter and area of a trapezium?
A trapezium is a 2D shape that is also known as a trapezoid. To make sure what you’re looking at is a trapezium shape, here’s what it should look like:
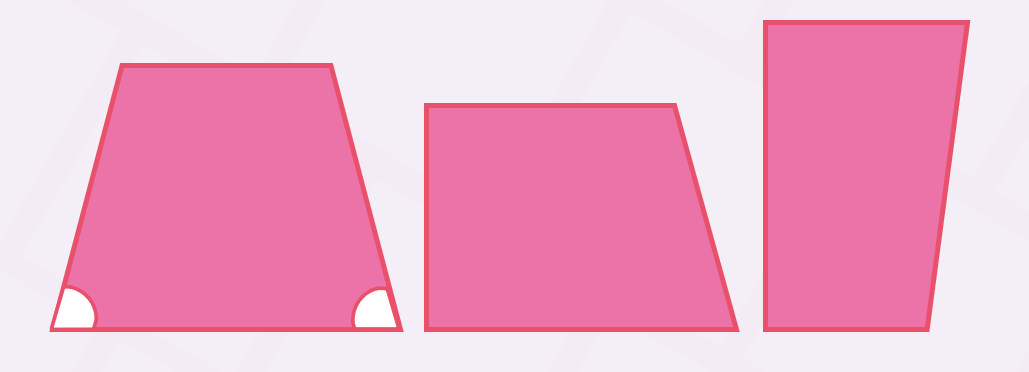
For it to be a trapezium it needs to have 4 sides. Two of these slides need to be parallel, but they don’t have to be the same length.
The other sides have to be at different angles and not parallel. If the shape you're looking at matches these criteria then it’s a trapezium.
Trapeziums have:
A trapezium is a two-dimensional shape that falls into the quadrilateral family of shapes. As you read above, it has multiple properties like many other 2D shapes, including angles. All trapezium angles (just as in other quadrilateral shapes) add up to 360°. This means that all four angles within a trapezium will add up to this amount, and won’t exceed it.
Out of the four angles, the two that are adjacent to one another are supplementary; this means that they’ll add to 180° (both are 90°). The other two angles will amount to 180°, but they won’t be the same.
There are three types of trapezium, that have the same names as different types of triangles:
Here’s some easy hints as to whether your shape is a trapezium or not. Use these to identify the shapes you’re looking at:
When you’re researching trapeziums, you might come across the word ‘trapezoid’. This isn’t a problem, but it can be confusing sometimes.
‘Trapezoid’ is the term used in the United States and trapezium is what’s used in the United Kingdom. So, if you ever see these two words you don’t need to worry, they’re the same shape.
There is a knack to working out the area of a trapezium, and we’re here to let you in on that secret!
Well, it’s really not much of a secret; more like an equation. It goes like this.
To find the perimeter of a trapezium, you need to find the sum of the lengths of its four sides.
To find the area of a trapezium, you have to use the following formula:
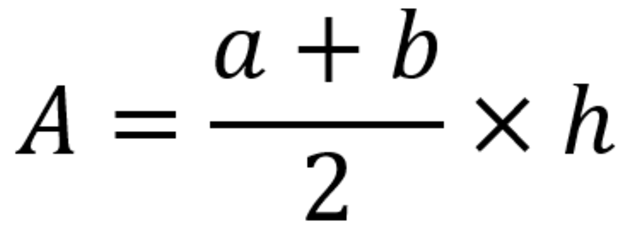
In this formula, the big ‘A’ stands for ‘area’. The small ‘a’ represents one of the parallel sides of the trapezium, while the small ‘b’ represents the other. The value ‘h’ stands for the distance between these parallel sides.
When you have these measurements, you essentially have to add together the parallel sides, divide them by two, and then multiply them by the distance between them. Still with us?
For example, on this trapezium, you would first identify and measure the parallel sides. Let’s say that the side measuring 4cm is ‘a’, and the side measuring 8cm is ‘b’. Add these up to get 12cm, and then divide by two to get 6cm. Now, hold onto that number! We’ll be needing it.
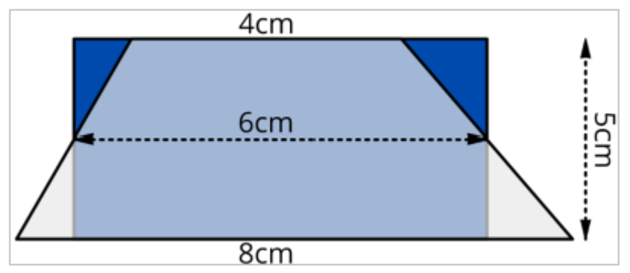
Now you need to measure the distance between the parallel sides, which, in this case, is 5cm. From there, simply multiply 6cm by 5cm, which is 30. So, the area of this trapezium is 30cm!
For a few examples on how to find the areas of different shaped trapeziums, take a look at this Area of a Trapezium Wiki Page. It's an in depth guide which is easy to follow. The equation above might look a bit complicated, but this guide will take you through it. There's some examples too, so you can see how it's done.
Here’s a list of places you might find trapeziums in real life. Take a look around the next time you’re out and about, or even in your own home, to see if you can spot any:
Here at Twinkl, we have a wonderful range of resources you can use to assist in teaching this topic. You’ll find PowerPoints, worksheets, lesson packs and even display resources – all of which are available to make your life easier! Our maths resources have all been created by a wonderful team of fully qualified teachers who know the curriculum inside and out. With this, you can trust that our materials have been made alongside the national curriculum aims and objectives, which will help you stay on track.
What’s more, our content is accurate, relevant, and up to date. So, no need to waste your time fact checking! Many of our resources also come equipped with answers to adult guidance to help you plan the best lesson for your young learners. What more could you want?
Although children will begin to learn about trapezium angles and how to work out the area of a trapezium in later stages, our resources give a good insight into trapeziums and other quadrilaterals. You can use them as introductory resources and help your young learners develop accurate knowledge and understanding of quadrilaterals shapes.
We have plenty of teacher-made resources for teaching children more about this primary shape - all of which are designed with the Australian curriculum in mind. Take a look at what we have to offer:
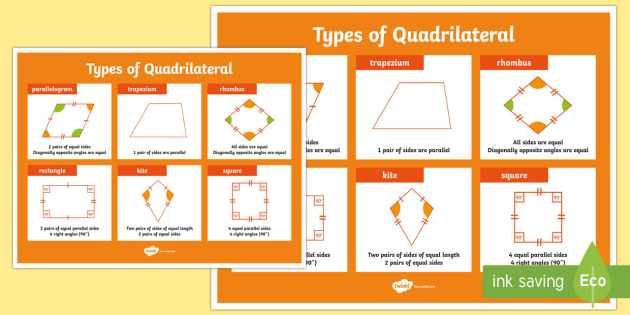
Types of Quadrilateral Poster - This is a lovely resource that your children can use as a reference for trapeziums and other shapes. Either keep it small, or print onto A3 paper so that you can include it in a bold display on posters.
2D Shape Properties Display Photos - Similarly, these posters are great for making a colourful display that ensures the properties of different shapes, such as the trapezium, stay at your children’s fingertips.
Maths Area of a Trapezium Worksheet - Try something a little more challenging with this worksheet, which both contains instructions for finding the area of this irregular shape, and questions to solidify the teaching.
 Home
Home  Membership
  TwinklCares
  Create
  Blog
Blog